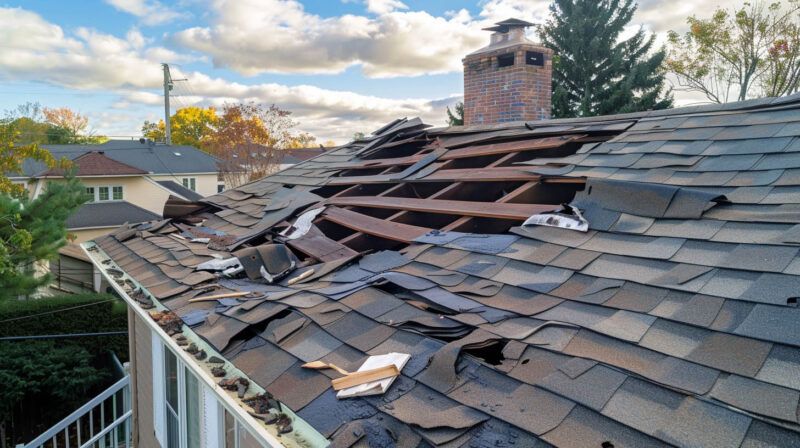
A hailstorm can strike suddenly, leaving behind shattered skylights, dented gutters, and cracked shingles. For homeowners in Troy, MI, hail damage is an unfortunate reality—especially during spring and summer when severe storms are common. The good news? Most homeowners insurance policies cover hail-related roof damage. The challenge, however, lies in navigating the claims process effectively. In this blog, we’ll walk you through a step-by-step guide to claiming hail damage for your roof and ensuring you get the repair or replacement your home needs.
Why Hail Damage Can’t Be Ignored
Hail may not always cause visible destruction from the ground, but even small impacts can bruise shingles, knock off granules, and weaken your roof’s waterproofing layers. Left unaddressed, these seemingly minor issues can lead to leaks, wood rot, and interior damage months—or even years—after the storm.
That’s why it’s critical to act fast. Waiting too long could not only worsen the problem but also complicate your insurance claim, especially if your policy has deadlines for reporting storm damage.
Step 1: Inspect the Damage Safely
After the hailstorm has passed and it’s safe to go outside, conduct a basic visual inspection of your home:
- Look for dented gutters, downspouts, or flashing
- Check for missing or discolored shingles
- Scan the yard for hailstones or broken roof material
- Inspect siding, windows, and skylights for impact marks
Avoid climbing onto the roof yourself—especially if it’s wet or unstable. Instead, document what you can from the ground with photos and videos. This early evidence is helpful for both your roofing contractor and insurance adjuster.
Step 2: Contact a Trusted Roofing Contractor
Before calling your insurance company, reach out to a reputable roofing contractor for a professional inspection. Why? Because an experienced roofer can identify damage that isn’t obvious and provide a thorough report that strengthens your insurance claim.
180 Contractors Roofing & Siding has extensive experience helping Troy homeowners assess hail damage and navigate the insurance process. Our team provides detailed inspection reports, photo documentation, and honest guidance on whether a repair or full replacement is needed.
Step 3: Review Your Insurance Policy
While your contractor prepares their report, take a moment to review your homeowner’s insurance policy. Look specifically for:
- Hail and wind coverage under your dwelling protection
- Policy deductibles and coverage limits
- Time frame for filing a claim (often 6 to 12 months after the storm)
- Requirements for contractor selection or material use
This will help you understand what to expect financially and ensure you stay within claim deadlines.
Step 4: File Your Insurance Claim
With your roofer’s report in hand, contact your insurance provider to start the claims process. Be ready to provide:
- Date and time of the storm
- Photos of damage and surrounding areas
- Roofing contractor’s inspection report
- Any temporary repairs you made to prevent further damage
Once your claim is submitted, your insurance company will schedule an adjuster to inspect the property.
Step 5: Meet with the Insurance Adjuster
The adjuster’s job is to confirm the scope and extent of hail damage. It’s a good idea to have your roofing contractor present during this visit to ensure all issues are documented accurately and nothing is overlooked.
After the inspection, the adjuster will create an estimate and determine what your insurance will cover.
Step 6: Review the Claim Settlement
Once your claim is approved, you’ll receive a settlement breakdown that outlines how much your insurer will pay and what your deductible will be. Make sure to review this carefully with your contractor to verify that the costs align with the actual repair or replacement needs.
If you feel the settlement is too low, you have the right to dispute the estimate and request a second inspection.
Step 7: Begin the Repair or Replacement
Once you approve the settlement, your contractor can begin the work. Be sure the agreement includes:
- Scope of work and timeline
- Materials to be used (preferably high-quality, hail-resistant options)
- Payment structure and warranties
At 180 Contractors Roofing & Siding, we use premium products like Owens Corning shingles, which are designed for impact resistance and long-term durability—perfect for Michigan’s storm-prone climate.
Step 8: Final Inspection and Documentation
After the work is completed, your roofer should perform a final walkthrough with you to ensure everything meets expectations. Take photos of the finished job and keep copies of all invoices and documents for your records. These may be needed if further issues arise or if your insurance requires proof of completion.
Why Local Expertise Matters
Choosing a local contractor ensures you’re working with someone who understands Troy’s building codes, weather patterns, and insurance processes. Unlike out-of-town “storm chasers,” local professionals are invested in your satisfaction—and will be here long after the storm passes.
Read also our blog:
How to Protect Yourself from Roofing Scams After Storms
Don’t Wait—Start the Hail Claim Process Today
The sooner you act after a hailstorm, the easier it is to secure coverage and avoid long-term damage. By following this step-by-step guide and partnering with a trusted contractor like 180 Contractors Roofing & Siding, you can restore your roof with confidence—and keep your home protected for years to come.